How to Hang a Shelf on Tile – It’s Easy with GoShelf!

Tile work is not for the faint of heart. It requires knowledge and special skill, which is why re-doing a bathroom is often left to the professionals. But, if you’re curious about tile work and thinking of expanding your DIY skills, we’ve got the perfect project for you. GoShelf will teach you how to hang a shelf on tile in no time!
How to Hang a Shelf on Tile the GoShelf Way
Once you pick out your GoShelf, we’ll send you everything you’ll need to install your very own gorgeous corner shower shelf. Here’s how it works:
Step 1: Order Your Shelf
First, decide which GoShelf style is right for your bathroom. We’ve got 12 beautiful styles in 3 sizes (7, 8, and 9-inches). Popular styles include Carrera, Atlantic and our newest color, Caramel. If you want to see the options in person, you can always order samples.
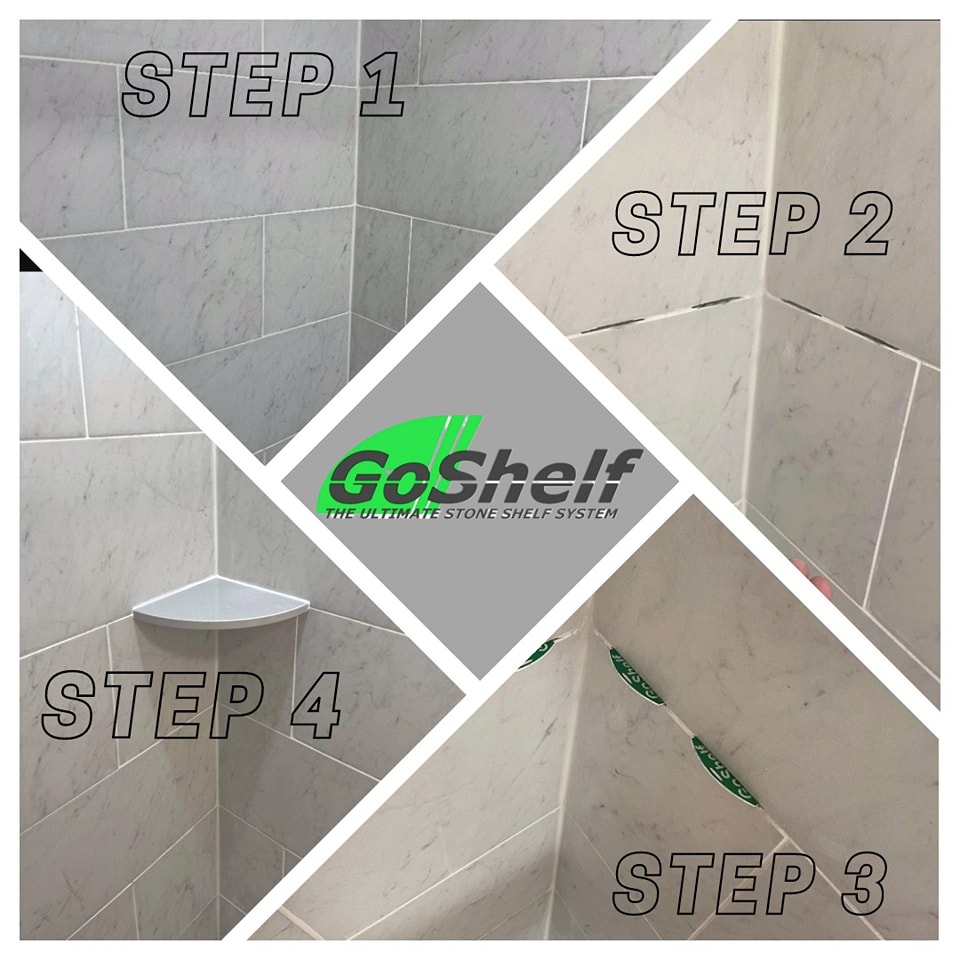
Step 2: Prepare Your Space
Choose where you’ll install your shelf and then remove everything from your shower. To ensure a quick clean up, you can place a drop cloth in your bathtub.
Step 3: Install Your Shelf
We have videos and detailed instructions on our website that you can refer to for additional support, but installing a GoShelf is simple. In fact, you can learn how to hang a shelf on
- Use the enclosed handheld grout saw to remove the grout at the spot you’ve decided to install your shelf or shelves. (There are some great designs out there for 2 or more corner shelves.)
- Use the adhesive we’ve supplied in your GoShelf kit to cover half of each anchoring plate (tops and bottoms).
- Place each anchoring plate into the gaps you’ve made in your grout.
- Using the remaining glue, completely coat each channel of your GoShelf.
- With adhesive in the channels, pick up your GoShelf and firmly place it onto the anchoring plates already in your tile wall.
- Wait 24 hours. Once dry, you can use either grout or caulk to create a watertight seal.
Order yours today!