Installing a DIY corner shelf usually takes some finesse. But with the GoShelf system, we take all the struggle out of DIY shelving. These beautiful stone corner shelves, available in 11 elegant varieties of stone, are easy to install yourself using only the materials we include in our kit.
Make sure to read the instructions before you start!
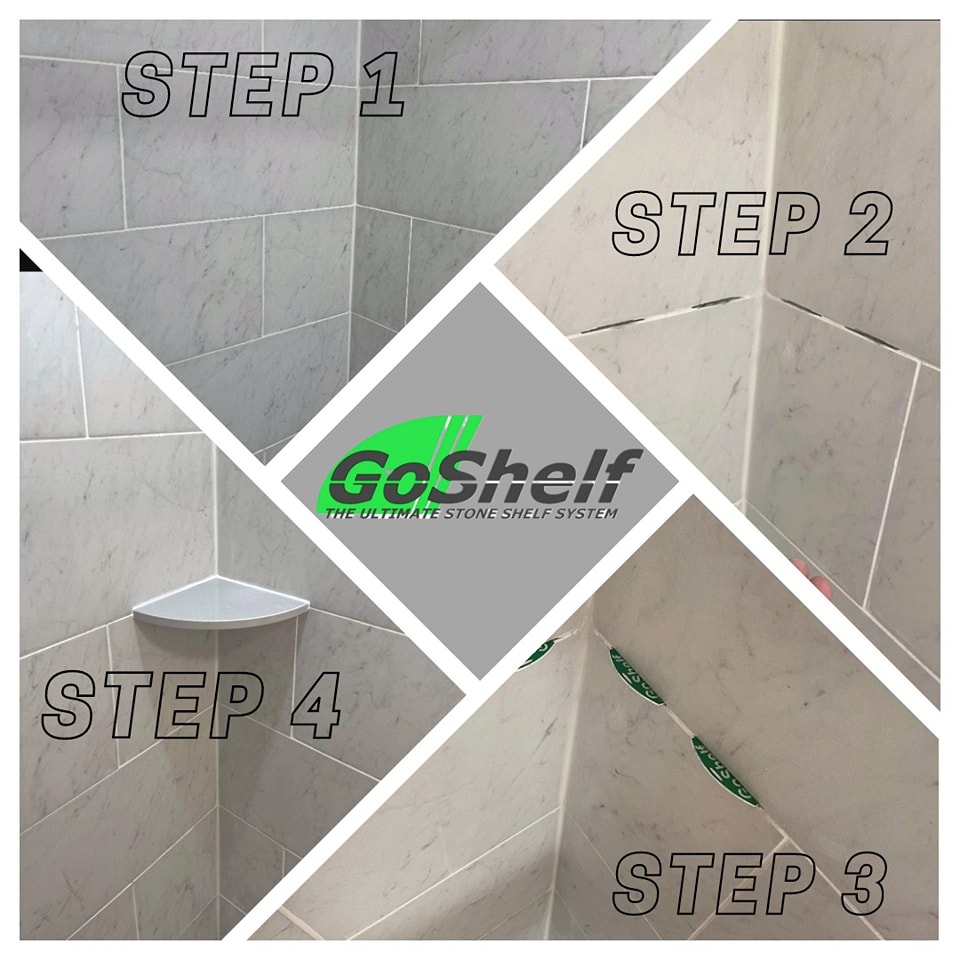
Step #1:
-
- Find a location where you would like to install your DIY corner shelf using the horizontal grout joints in the tiles.
- With a tape measure and a pencil mark 2 ½” and 6 ½” on the right and left sides of your walls where you would like your shelf, so that you’re left with 4 marks. These marks will be the center point of where you will need to remove the grout. Also mark the tile 8 ¾” from the inside corners out, this is to mark the outside edge of the shelf so you know not the cut/ remove the grout past those marks. ADVANCED METHOD: If you’re not using the grout joints, draw a level line at the elevation you desire, use the measurements listed above and plunge into the wall using an angle grinder and diamond blade.
Step #2: (ALWAYS! USE SAFETY GLASSES AND A DUST MASK)
-
- Pick your tool of choice: A hand held grout saw, oscillating power tool with a 1/16”grout removal blade or a 4” angle grinder with a thin kerf continuous rim diamond blade (It’s highly recommended that you use the oscillating power tool with the grout removal blade or a grinder if you think your grout joint could possibly be less than 1/16”). Take your time removing the grout and check your depth with your anchoring plate as you go, the anchor plate should fit half way into the wall.
- TIP! Use a vacuum while you remove the grout to help keep the dust down to a minimum.
- Start to remove the grout slowly at the marks you made, removing grout approximately 3” wide and ½” deep, you may need to cut into the backer board a bit to get the proper depth, it is important to check that the anchoring plate goes half way into the wall and fits snug (Note: If the anchoring plate is a little loose in the wall that’s ok, it just can’t fall out. If it is falling out you may need to remove more grout so the anchor can go little deeper, or try using a household item to help wedge it into the wall (maybe a toothpick would work nice), just be sure your wedge doesn’t interfere with the installation of the shelf. Clean the cuts in the wall you made with a vacuum and a damp sponge or rag.
Step #3:
-
- If you have a porous tile or stone you may want to use blue painters tape to protect the areas of tile around the shelf from any excess glue that may drip or expand onto the tile.
-
- With clean water, wet the anchoring plates (x4). TIP! It’s best to hold them in a bowl of water.
- With a sponge or a spray bottle, dampen the 4 channels you made in the wall and the shelf channel (this helps the glue set).
- Add a small amount of glue to both sides of the anchoring plate on the half that will be inserted into the wall, do this one at a time. TIP! If too much glue is used, don’t worry, just wait until it dries completely and cut/scrap it back with a single edge razor blade.
- Get your GoShelf and squeeze the glue into its channels, mainly where the anchors will fall (remember that the glue expands).
- Line up all the anchoring plates with the shelf channels and simply slide the shelf in place making sure it is pushed tight against the walls, if the wall is a little out of square simply split the difference and the grout or caulking will fill in the space after it all dries. TIP! Place a full shampoo bottle on the front side of the shelf, it will provide a small pitch to help divert water of the shelf. Important: Wait for the glue to dry completely (2-3 hours).
Step #4:
- With a razor knife or a single edge razor remove any glue that may have expanded onto the tiles (some stone is soft and can scratch easily so be very careful when you remove the excess glue), clean the tiles/shelf in preparation to be finished.
- Install a matching grout or caulking where the shelf meets the wall.
Note: The GoShelf Systems advanced installations may require the use of a wet saw and/or angle grinder. If the joints are less than 1/16,” an angle grinder with a diamond blade works best to get the proper joint size required for the anchors. If the existing walls are out of square, a wet saw works well to cut the shelf to fit the walls shape (you can only remove ¼” from each side of the shelf). For large format tiles, mosaics and tiles installed on a pattern, you can use the angle grinder and diamond blade to plunge into the wall. It is highly recommended that an experienced tradesman do these types of installs.
Download GoShelf Instructions as PDF