Installing Shower Shelf on Already Tiled Wall: The GoShelf System

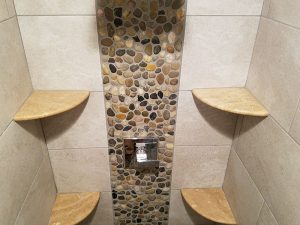
Showers with built-in shelving are highly desirable. But sometimes, you face a situation where your shower was tiled without storage space being added in the process. Luckily, there’s a safe and effective method for installing shower shelf on already tiled wall: GoShelf! Let’s go into the easy four-step process for putting this system to work to enhance your shower.
Installing Shower Shelf on Already Tiled Wall: The GoShelf System
If your shower could use supplemental storage, simply follow these steps to add a GoShelf (or several shower shelves) at any horizontal grout line, in any corner:
- Use a tape measure and pencil to mark the places where you’ll remove a small amount of grout for each of the four GoShelf wall anchoring plates. Don’t worry – this shouldn’t damage the tile!
- With an oscillating power tool or grout saw, take out enough grout that the anchoring plates go about halfway into the wall.
- Apply a small amount of glue to both sides of each plate and insert them into the grooves you’ve created, one by one.
- Add glue to the GoShelf channel on both edges and slide it onto the plates so it fits tightly into the corner.
And that’s all there is to it! Lastly, simply wait a few hours for the adhesive to dry completely, and your GoShelf will be ready to hold all your shower essentials. With no damage to the tile involved, you’ll have upped both the functionality and aesthetic appeal of your shower!
Optimize Space & Beautify Your Shower with GoShelf
Now that we’ve shown you why GoShelf is the very best way of installing shower shelf on already tiled wall, we’d like to invite you to peruse our selection of stunning GoShelf designs to find your favorite. You can order samples of your top three, or go ahead and order your GoShelf kit if you’re confident you’ve landed on a great match. Either way, we’ll be here to help if you need us – feel free to contact us anytime for questions, GoShelf advice or customer service!


