Hello, my name is Ian Stefenack, inventor of GoShelf™. I am an experienced tile contractor with over 20 years in the business. In that time I have installed many corner shelves. This time-consuming addition to shower and tub walls is something I have greatly improved on. Now I am able to offer you my simple method for installing beautiful stone corner shelving in an efficient and sturdy way. Introducing my GoShelf system! These shelves are proudly made in the USA!
My method for installing stone shower shelves is so easy it can be done by anyone in minutes!
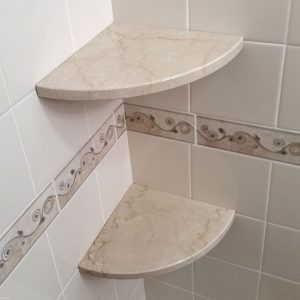
My beautifully fabricated stone shelving is available in multiple colors!
Make GoShelf your next easy to do DIY project!
To learn more read our easy to follow instructions for installing stone corner shelving in no time at all.
I’d like to share with you why GoShelf should be, and I am sure will be, your go-to product for installing corner shelving in new and existing tile walls. This applies to experienced tile setters or any weekend warrior ready to add a stone corner shelf to any tiled wall.
GoShelf provides solutions to:
New installs: Contractors, there’s no need to install the corner shelves while you’re setting the tiles, No need to make difficult L shape cuts around the shelves. Grout the entire tub/shower without the shelves being in your way because you can install the shelves last, in minutes.
- Replace or repair, GoShelf makes this much easier to do with less of a chance of damaging the surrounding tiles.
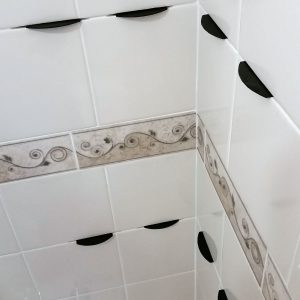
- No visible means of support. Unlike other shelf systems on the market, the GoShelf has no visible means of support once the shelf is installed giving that custom look you and your customer’s would expect.
Easily installed to existing tiled walls: Don’t remove tiles or make large invasive cuts in your walls. Doing this destroys the cement board, waterproofing and integrity of the walls creating potential problem areas where water can get behind the tiles and into the wall causing leaks, mold or both.
- The GoShelf system allows you to install a stone corner shelf in 4 easy steps without large invasive cuts or damage to the surrounding tiles. Guaranteed!
- Requires only a small amount of grout to be removed to set the provided anchoring plates.
- Finish GoShelf with matching grout or caulking
Versatile! Note the following examples are situations where advanced installation methods may be required and it is highly recommended that an experienced professional do the installs.
- Not only can the GoShelf be cut or scribed to conform to walls that are out of square, it is by far the best option if the wall tiles are on a pattern!
- Let me explain, simply make a level lines at the elevation you desire, use a grinder or an oscillating cutting tool to plunge cut into the tiles, just far enough to accept half of the anchoring plates, now at this point you just follow our basic installation instructions.
- Think about how much time this will save you!! Imagine installing two or more shelves if your job calls for the tiles to be on a pattern? A diagonal, herring bone, hexagon, vertical running bond, harlequin, crazy mosaic pattern, the center of a large format tile, etc. This is where you’re going to save a whole lot of time and money, so this alone makes it all worth it!!
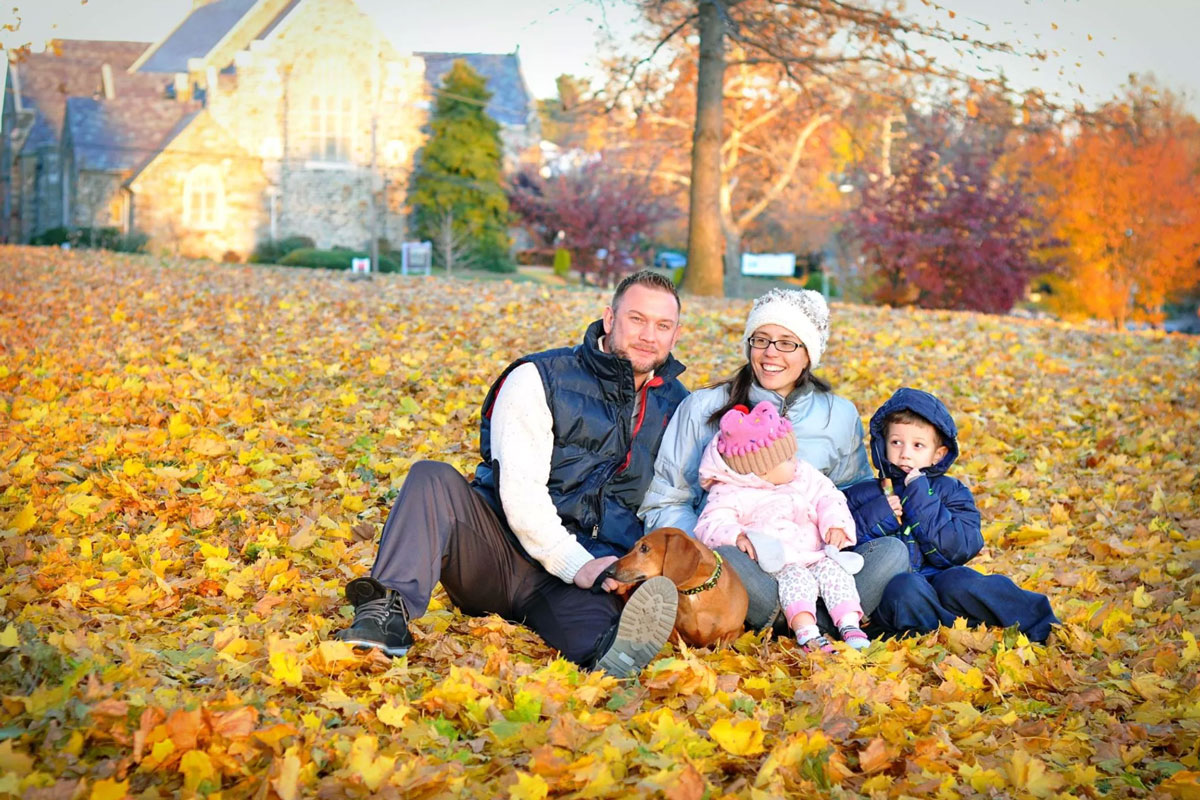
GoShelf Inventor Ian Stefenack and his family.
Ian Stefenack is an experienced tile contractor and the inventor of GoShelf™. GoShelf was an idea born out of years of working with tile and the need to solve a problem. The issue was the time consuming work of installing a stone corner shelf on a tiled wall. Ian set about developing an easier way to install a stone corner shelf and GoShelf was the result.
ISC Remodeling is Ian Stefenack’s full service contracting company based in Philadelphia, PA. The company specializes in bathrooms and kitchens with over 20 years of experience. They have won the Angie’s List Super Service Award many years in a row.
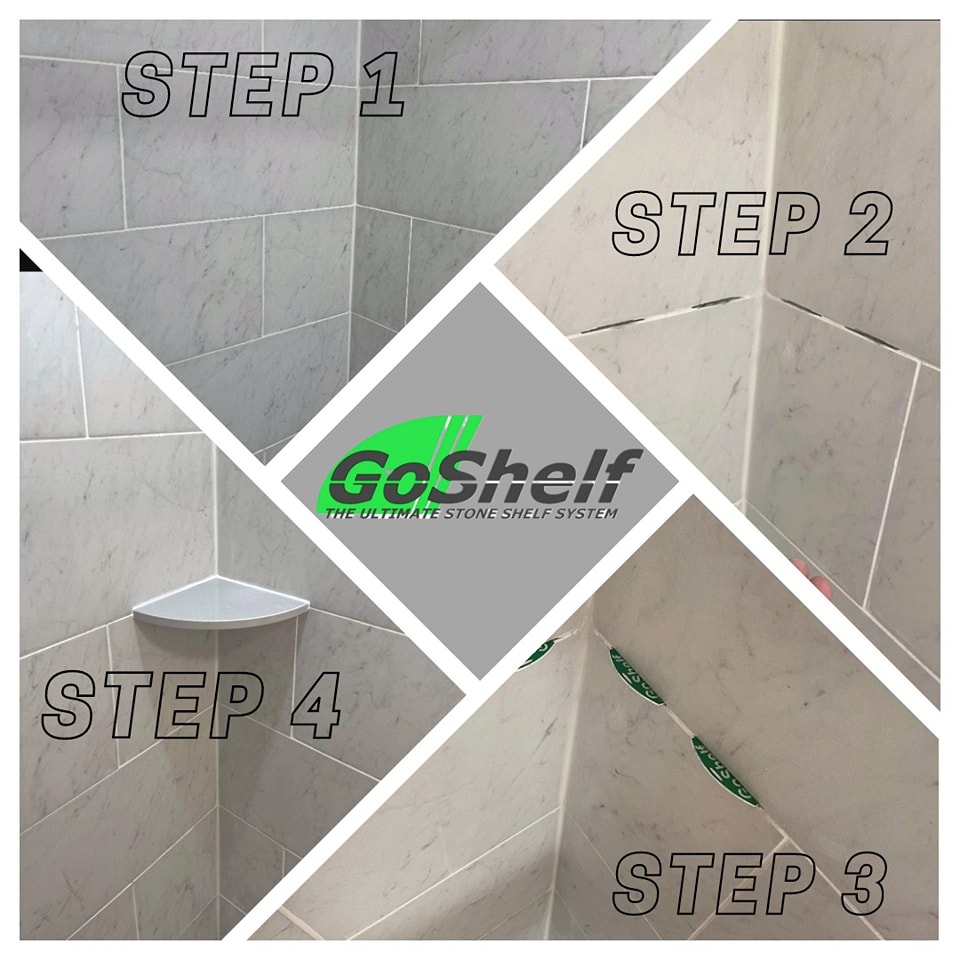
How To Install A Corner Shower Shelf
Step #1:
- Using the horizontal grout joint lines in the tile as your guide, decide where you would like to install your shelf.
- Grab a tape measure and pencil. Measuring from the inside corner on each wall, make a small mark on the grout joints 2 ½” and 6 ½” on both walls. You should have four marks in all; these marks will show you where to remove the grout.
Step #2:
- Safety first, last, and always! Make sure you wear safety glasses and a dust mask.
- Using a hand held grout saw or a power oscillating tool, slowly start to remove the grout from where you made your marks. You will want to create a space that is approximately 3” wide and ½” deep.
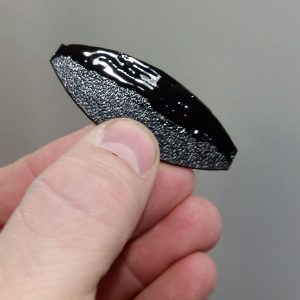
- Be sure the at the anchoring plates fit snuggly and go into the wall half way.
- Clean the channels you made in the grout using a vacuum and a sponge with clean water. Here’s a tip: Using a vacuum while you remove the grout will keep the dust to a minimum.
Step #3:
- Using clean water, wet four of the anchoring plates and place to the side.
- Dampen the four channels in the wall with a sponge or spray bottle. Do the same for the channels in the GoShelf itself.
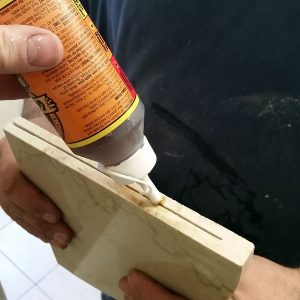
- One at a time, add a small amount of glue to the half of the anchoring plate that will be inserted into the wall. Be sure to add glue to both sides and to remove any excess glue with a clean towel.
- Next, slide the anchors into the channels you’ve made in the wall.
- Add glue to the channels of your GoShelf, where the anchors will be inserted. Remember, the glue will expand so there is no need to fill the channel.
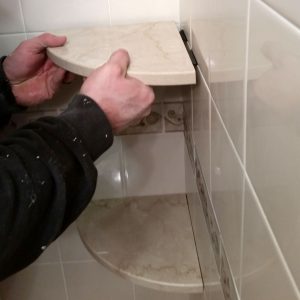
- Align the anchoring plates with the shelves channels and slide the shelf into place. Be sure to push it firmly against the walls.
- Allow the glue to dry completely, about 3-4 hours.
Step #4:
- After the glue has dried, you can remove any glue that may have expanded past the joints with a single-edge razor.
- Wipe the area clean and then install grout or caulking to the bottom and sides of where the shelf meets the walls.
Step #5:
- Congratulate yourself on a job well done and enjoy your new stone corner shower shelf!